Saber is a native macOS client for downloading from Usenet with your own provider account. This is the same guide built into the app, under Help → Saber User Guide.
3. Searching
Saber can search a Usenet indexer and queue a result without you ever handling the .nzb file yourself. It has no index of its own and no built-in provider: you supply the indexer and its API key, exactly as you supply the news server.
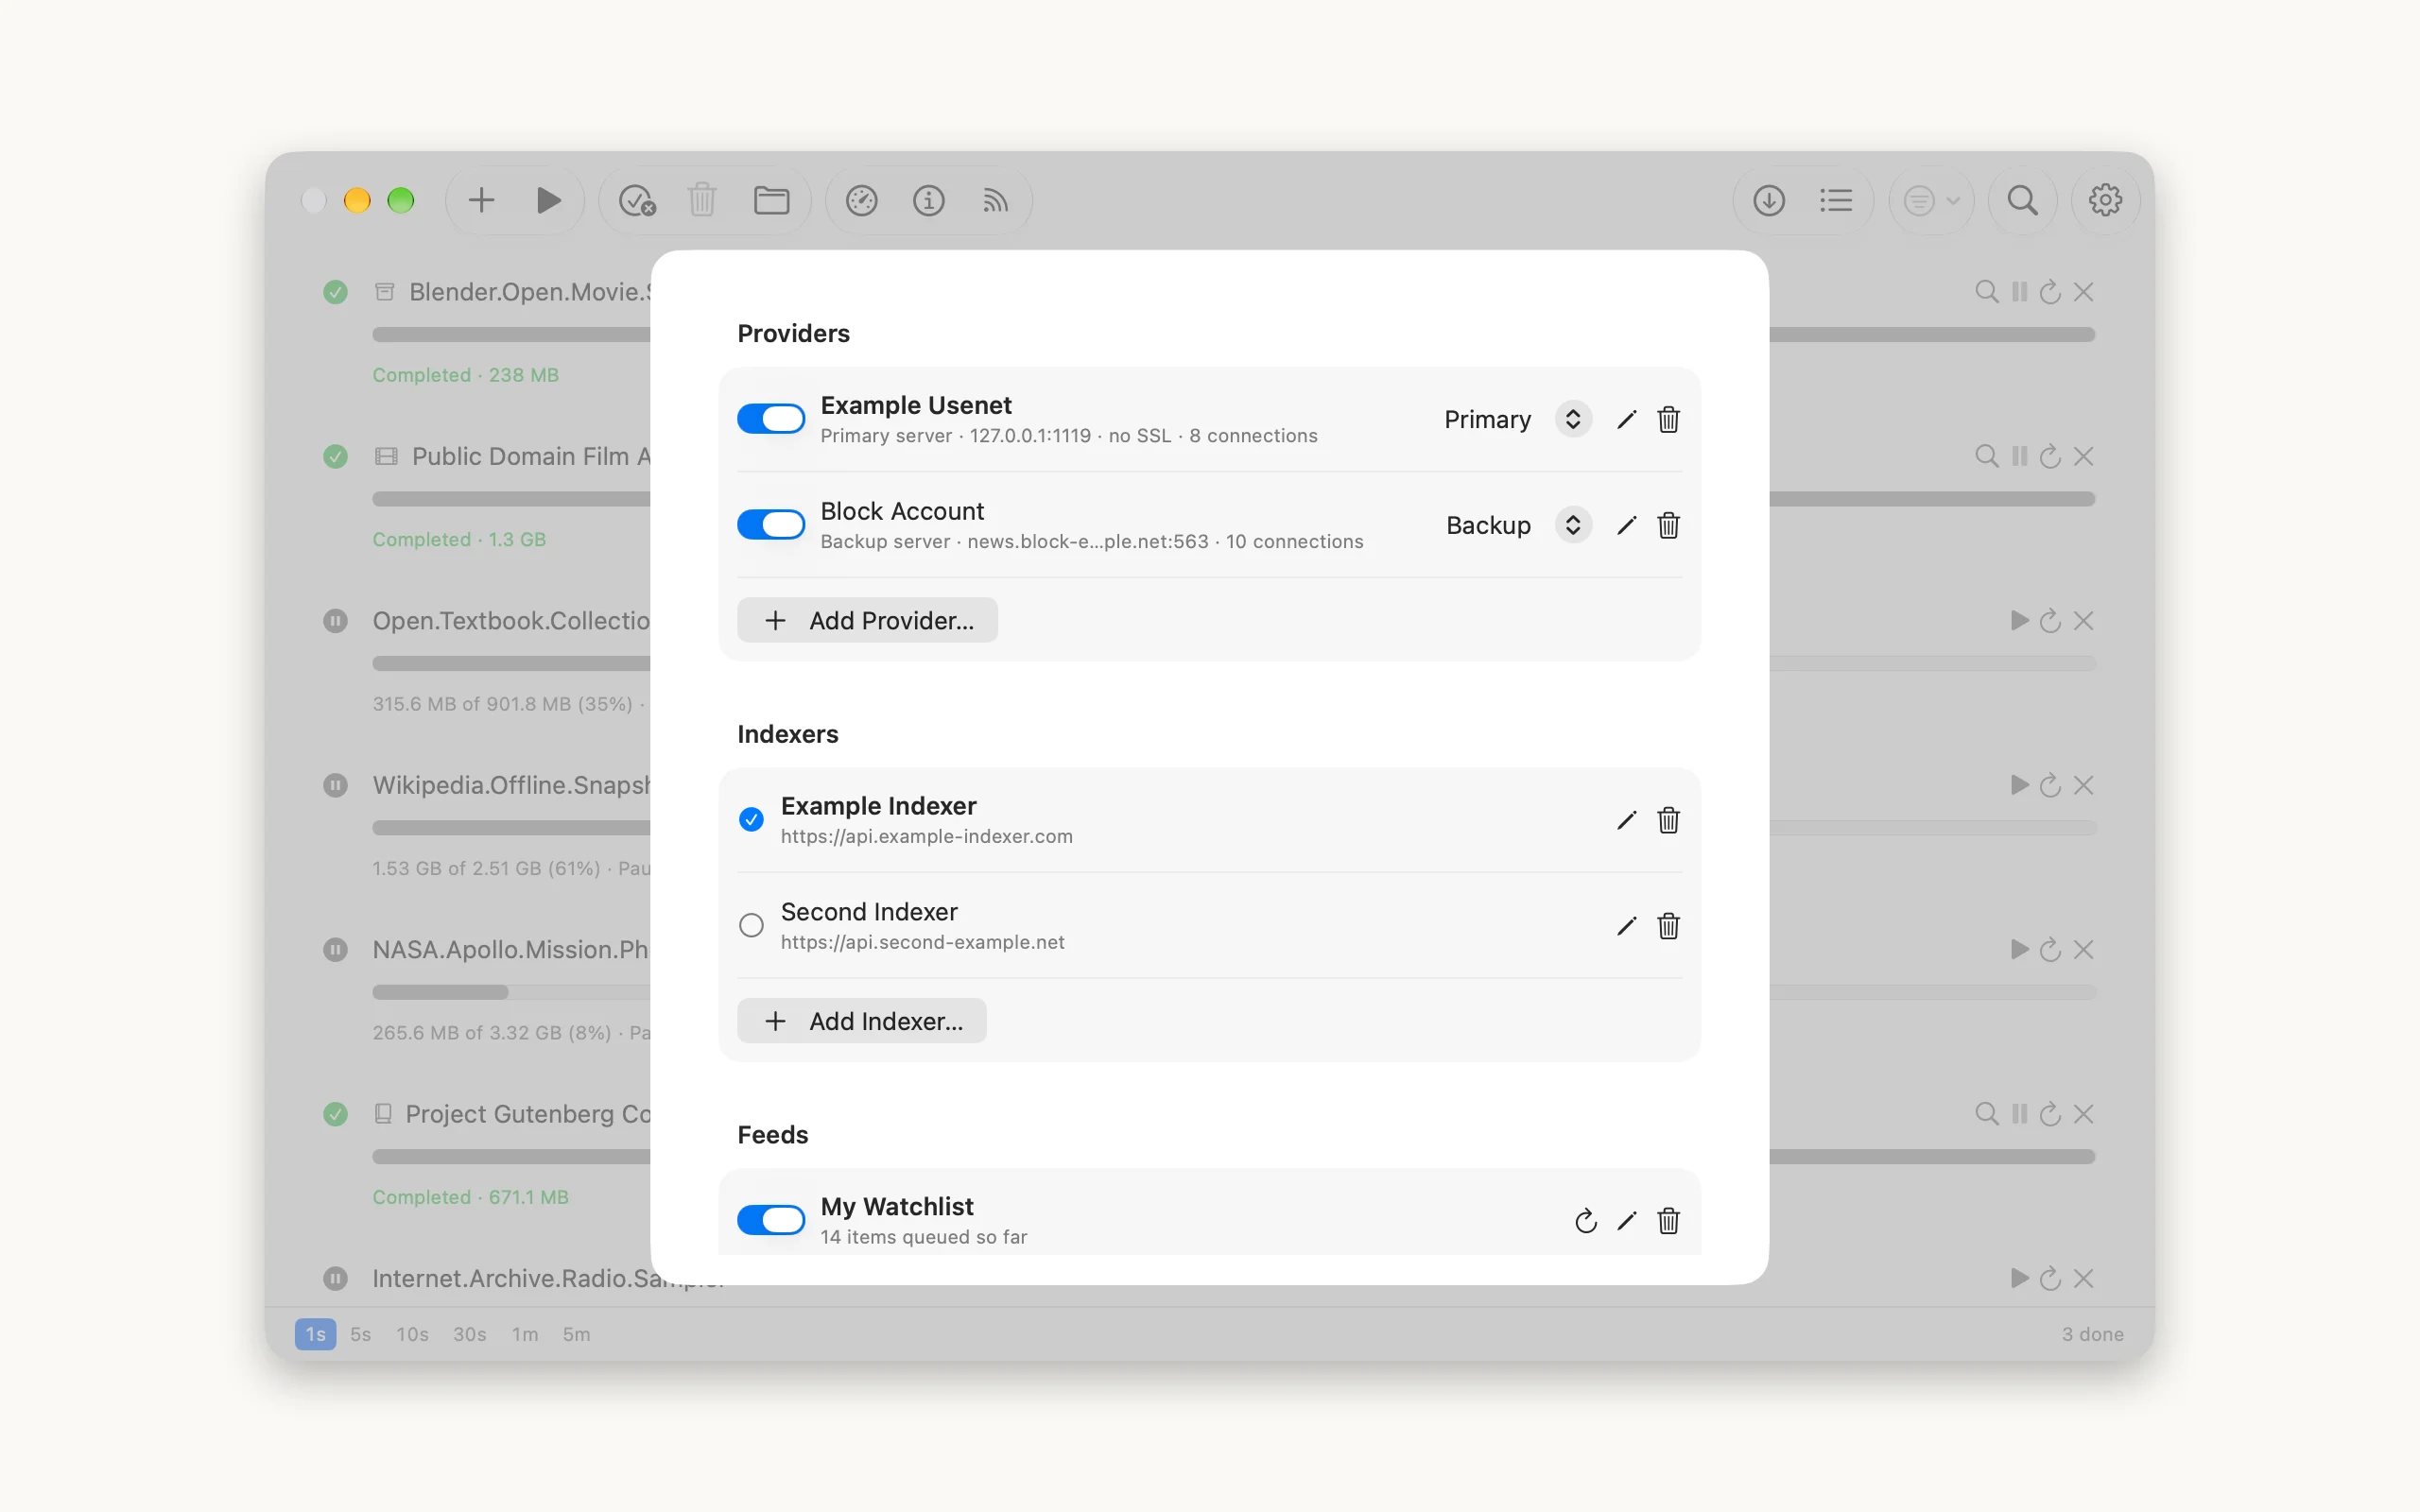
Adding an indexer
- Open Settings and find the Indexers section
- Add an indexer, choosing one of the presets or Custom Newznab for anything else
- Paste in the API key from your indexer account
- If you have more than one, the active indexer is the one search uses
The API key is kept in your Mac's Keychain, not in Saber's preferences. Nothing about what you search for is ever sent anywhere; see Search History below for the one thing Saber can optionally keep on your own Mac.
The active indexer can also be switched from the results header, above the list, without opening Settings. Switching there reruns the current query against the newly chosen indexer straight away, which is the quick way to run the same search past a second indexer to compare what each returns.
Running a search
Click the magnifier in the toolbar and it expands into a field. Type a query and press Return. Results show the release name, its size, how old the post is, its category and which indexer it came from.
Click any result to queue it. Saber fetches the NZB from your indexer in the background and the download starts as though you had added the file by hand. The indexer and category travel with it into the queue, so the download row still says where a release came from once it has left the results list behind.
The Search button, the one with the list icon, opens Search directly: with a previous query in hand it brings those results back without asking the indexer again, and with none yet it opens straight to the results header, useful for loading a saved search without running a throwaway one first. Nothing is re-fetched until you submit a new query, so returning to your results costs nothing.
The query shown in the results header can be edited in place, so narrowing or correcting a search is a small edit and a Return rather than reopening the toolbar's field, which always starts blank, and retyping the whole thing.
Saving a search
The bookmark button in the results header saves the current query under a name you choose, so you can come back to it later without retyping it. A saved search remembers only the query, not which indexer or category it was run with, so loading one runs it against whichever indexer is active at the time. The same saved search can be tried against a different indexer just by switching indexers first and loading it again.
The same button opens the list of searches you have already saved, where each one can be renamed or removed.
Search History
Off by default, in Settings under Search: turn on Save Search History and Saber keeps your last 12 queries, offered as a dropdown the next time you click into the search field in the results header. Picking one fills in the field rather than searching straight away, so you can adjust it first if you want to.
This is separate from saving a search: history is kept automatically for anything you search, saved searches are the ones you have deliberately chosen to keep. Turning the setting off stops anything new being added but does not erase what is already there; Clear Search History, beside the toggle, does that.
Narrowing by category
An indexer returns a limited number of results for a query, usually a hundred. A broad search spends all of them on whatever the indexer happened to return first, so choosing a category is often the difference between finding a release and not.
The category button sits to the left of the search field. It lists the categories your indexer actually offers, read from the indexer itself, with subcategories nested underneath their parent.
- Click a category to select it. Selected categories carry a checkmark, and a parent carries one when anything inside it is selected
- Click a selected category again to unselect it. The entries toggle, so the same click both adds and removes
- All Categories clears the whole selection at once
- Show All, in the bar above the results, does the same thing without opening the menu
The button names what is selected while the names fit and counts them when they do not, and the bar above the results lists them all. Your choice is remembered for each indexer separately, so it survives quitting Saber. It is worth glancing at before a search that returns nothing you expected: a category left selected from last time is the usual reason.
Changing the category runs the search again, since it is a different question.
Watching a feed
Most indexers publish an RSS feed: of a category, of a saved search, or of a list you have put together yourself. Saber can watch those feeds and queue anything new that appears in them, so a release you added to a watchlist turns up as a download without you going back to look.
- Open Settings and find the Feeds section
- Add a feed, give it a name, and paste in the address from your indexer
- Choose whether the items already in the feed should be queued now, or whether the feed should start from this moment
- Set how often feeds are read. Every two hours by default
Every item a feed offers is queued the first time it is seen, and never again: Saber keeps a record per feed of what it has already taken, so restarting the app does not fetch the same releases twice.
The switch beside each feed stops and starts it without deleting it, and the circular arrow beside that reads that one feed straight away. In the main window, the broadcast icon in the toolbar reads every feed at once, which is what you want after adding something to a watchlist rather than waiting for the next scheduled read.
A feed address contains your API key, so Saber keeps the whole address in your Mac's Keychain and never shows it again after you have entered it.
A feed points at whatever you aim it at. A watchlist or a saved search is a handful of releases. A whole category is thousands, and Saber will queue every one of them. If you are pointing at something broad, turn off "Queue items already in the feed" when you add it, so it starts from now rather than downloading the backlog.
4. Downloading
Adding an NZB
- Double-click the .nzb file in Finder
- Drag it onto the Saber window or the app icon
- Or use the + button in the toolbar
- Or let Saber watch a folder and pick them up on its own
- Or search an indexer from the toolbar and click a result
- Or let Saber watch an RSS feed and queue what appears in it
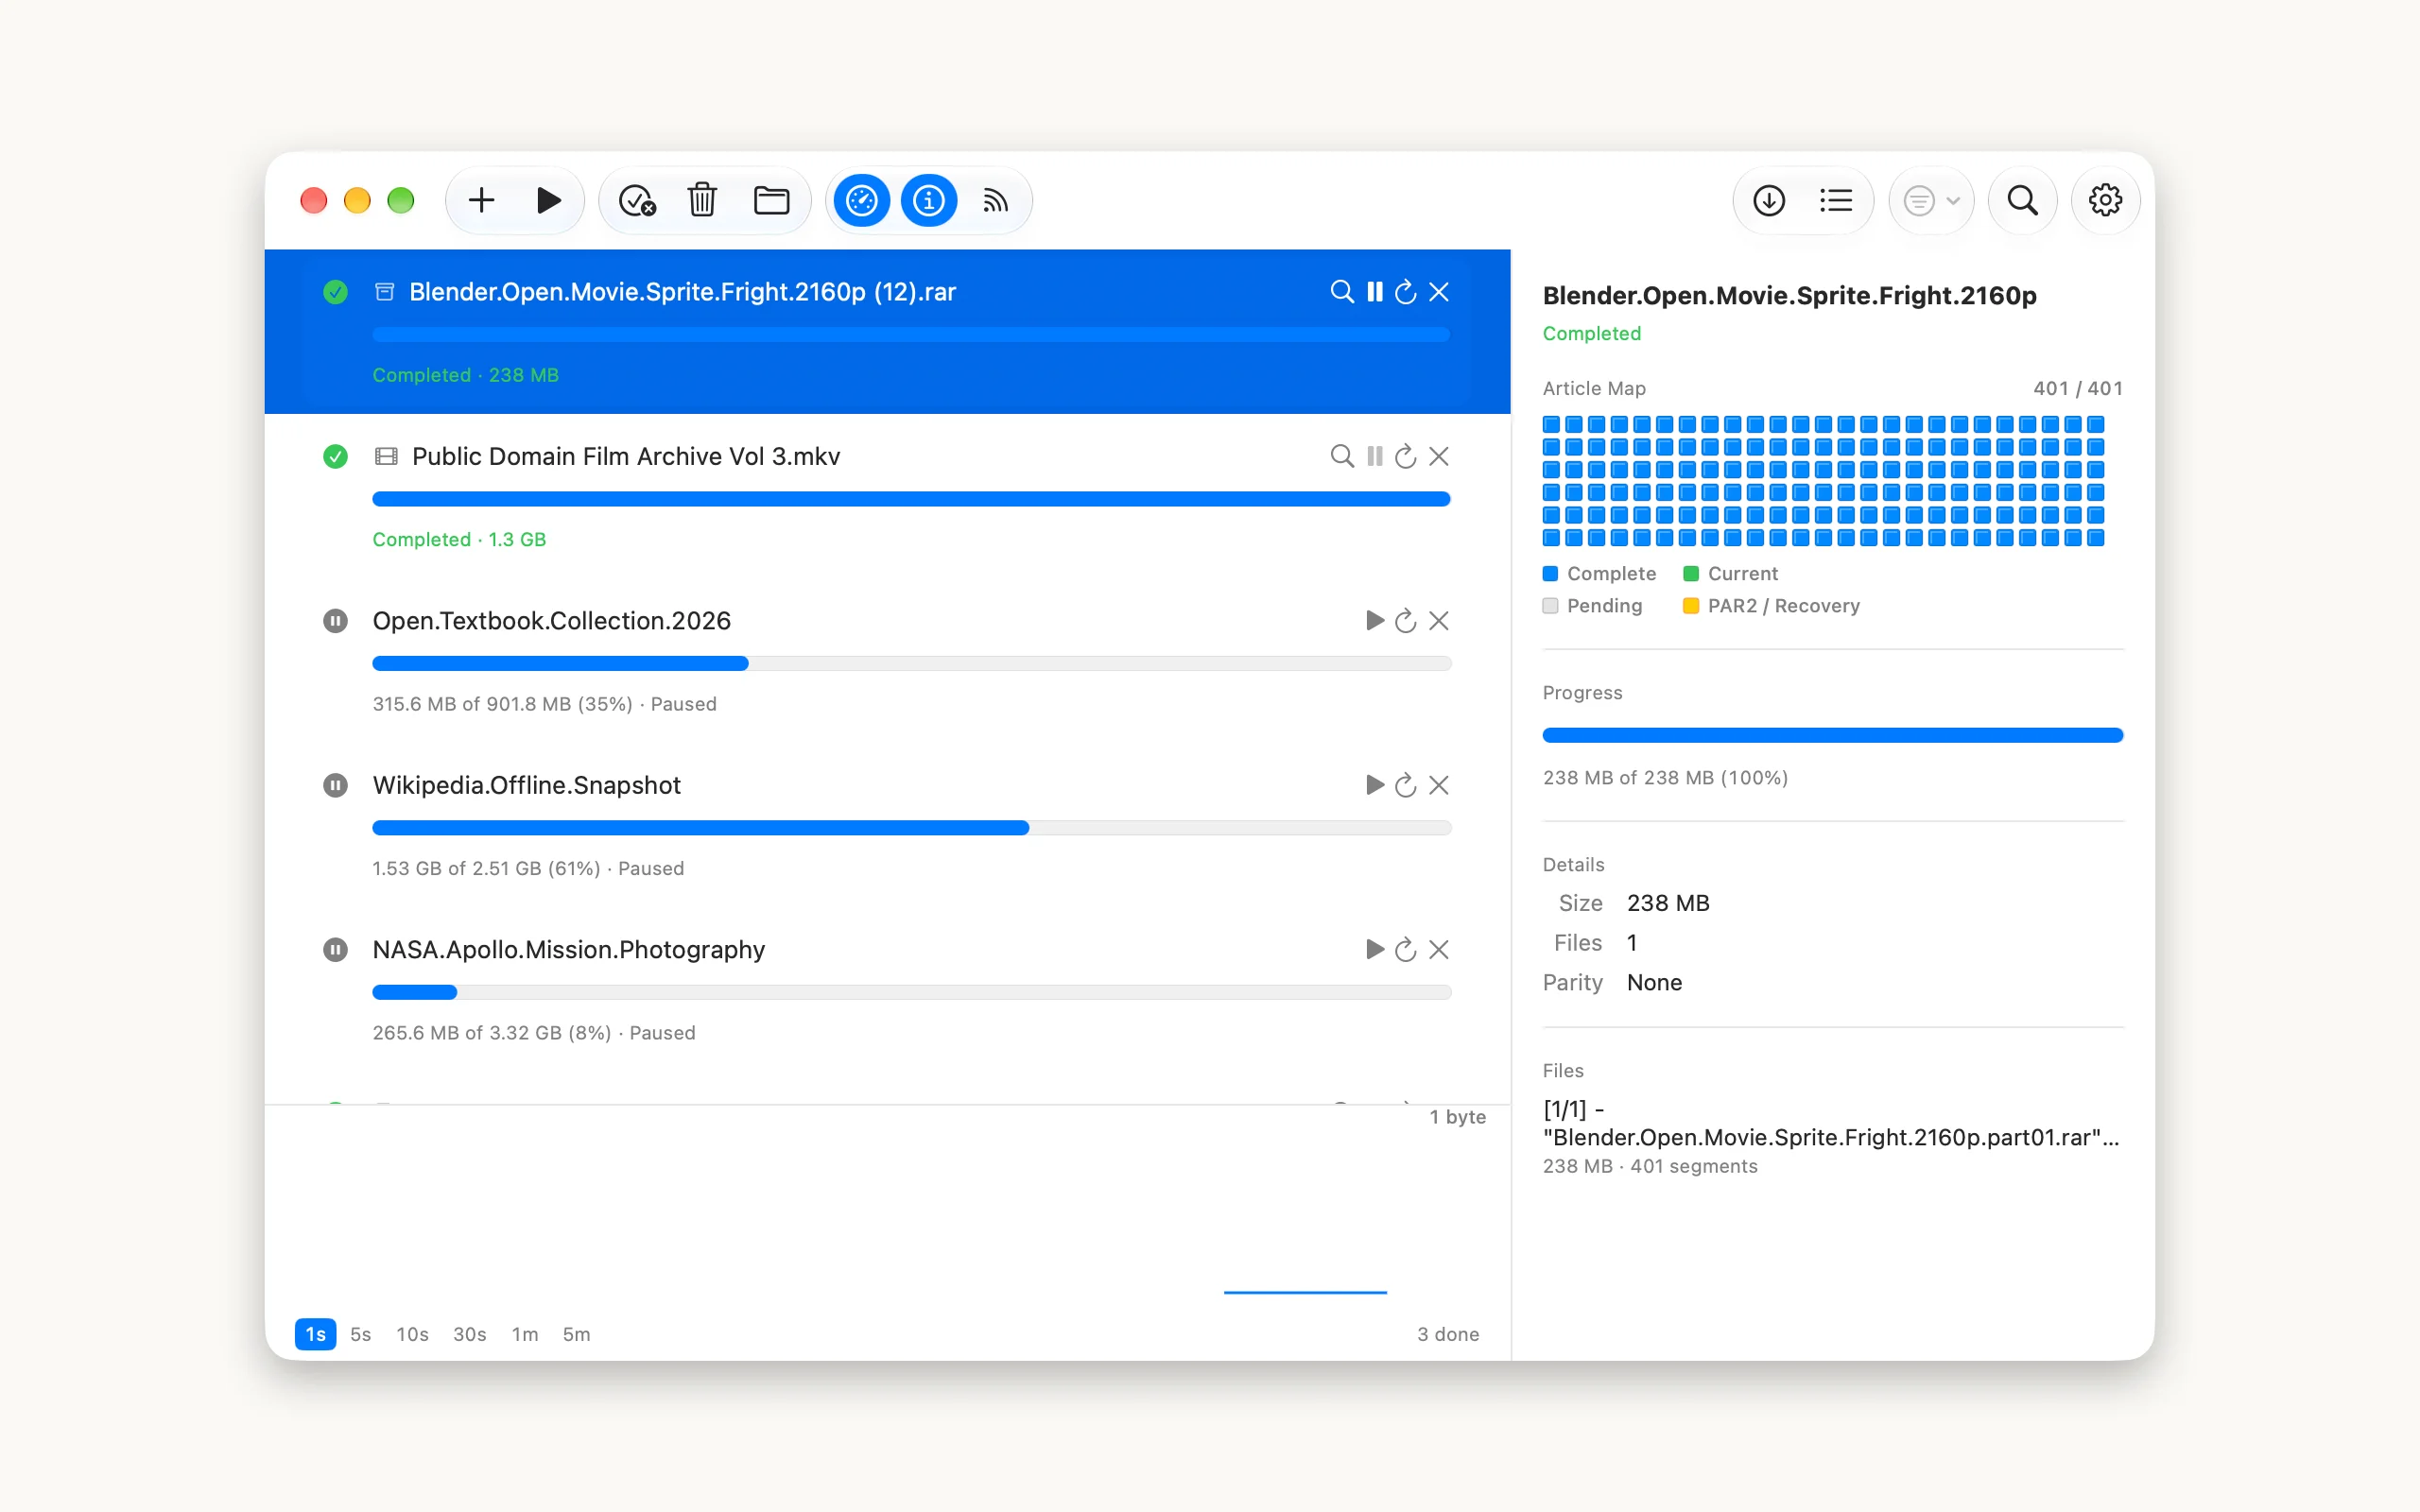
The download starts straight away. Each row shows the name, a progress bar, and a line beneath it reading how much has arrived and which file is being fetched. The speed, and the totals for the whole queue, are along the bottom of the window.
Watching a folder
Saber can watch a folder and queue any NZB that appears in it, so you never have to open the app to start a download. Point your browser's download folder at it and saving an NZB is enough to begin.
- Open Settings and find the Watch Folder section
- Turn on "Add NZB files from a folder automatically" and confirm the warning
- Choose the folder to watch. Saber offers the picker straight away the first time
- Drop an .nzb in, and it appears in the queue within a second or two
Watched NZB files are moved to the Trash. Every .nzb the watch folder picks up is queued and then moved to the Trash. This is not optional: a file left in place would be found again every time Saber launched. Point the watch at a folder you use for this and nothing else, rather than at your whole Downloads folder. Saber waits until each file has finished being written before it acts, so copying a large NZB in is safe.
The toolbar
- +: add an NZB file
- Pause / Play: stops or restarts everything at once
- Clear finished: removes completed rows from the list; the files stay where they were saved
- Remove: removes the selected downloads from the list, and deletes what they had fetched
- Folder: opens the folder finished downloads are saved to
- Speed Chart: shows or hides the transfer speed chart along the bottom of the window
- Inspector: shows or hides the panel with a selected download's details
- Read Feeds: reads every RSS feed now, rather than at the next scheduled check
- Downloads: returns to the queue from a search (Command-1)
- Search: opens Search, showing the last results without searching again if there are any (Command-2)
- Category: limits a search to particular categories
- Magnifier: expands into the search field
- Gear: Settings
Escape returns to the queue from anywhere. Switching indexer and saving a search are done from the results header once you have searched, not from the toolbar: see Searching above.
Right-click the toolbar to switch between icons alone and icons with their names, or to choose Customize Toolbar… and rearrange it.
Along the bottom, a status line counts what the queue is doing and totals the current download speed.
Each download
- Pause keeps everything already downloaded, so resuming asks only for the segments still missing
- Try again appears on a failed download and picks up where it stopped
- Start over discards the partial download and begins again
- Remove takes the download off the list and deletes what it had fetched
- Show in Finder opens the finished file; double-clicking the row does the same
Select a single download and click the info button to open its inspector. It shows the download's progress, size, password, where it came from, and an article map. Each box in the map is an article the release is made up of: complete, being fetched right now, or still to come. The yellow band shows the parity volumes held in reserve. On large posts a box can stand for many articles at once, so the map always fits the panel.
Changing the order
Downloads run one at a time, from the top of the list down. Drag a row up or down to change what runs next, and a gap opens where it will land. A download already under way keeps going; reordering decides what follows it.
What happens after the download
- Articles are fetched in parallel and each one is checked against its checksum
- The complete file is reassembled in a working folder
- The post's par2 is fetched and the download is checked against it
- Anything missing or damaged is rebuilt
- Any archive is unpacked, repeatedly if the release is packed more than once
- The finished payload is moved to your chosen folder and the working folder is deleted
If an article arrives damaged, Saber asks the server for it again, up to three times. If it cannot be had at all, the download carries on and the gap is filled from the post's parity volumes.
Every post that carries parity also carries a small file listing what the release should contain, and that one always comes down: the finished download is checked against it before anything is unpacked, and nothing damaged is ever delivered. The recovery volumes themselves are only fetched if that check finds something to rebuild, and then only as many as the damage needs, so a healthy release does not pay the five to fifteen per cent that parity would otherwise add.
Some files are filtered out by default, with no setup needed. Saber never delivers .par2, .sfv, .srr, .srs, .nfo, .txt, .diz or .url files, or sample, proof or screenshot folders: what lands in your chosen folder is the release itself, not the parts it was posted in. This happens automatically, for everyone, and cannot be turned off. Turn on Filter Extra Unwanted Files in Settings and add to its list if you want more left behind.
Quitting is safe. The queue and everything downloaded so far are kept between launches. Close Saber mid-download and it picks up where it stopped when you reopen it; a download you paused stays paused until you start it again.
Finding the finished file. A release holding one file is delivered under the release's name, keeping the file's own extension, because posters often store the payload under a scrambled name and the release is what you recognise. It keeps the date stored in the archive rather than the time you downloaded it, so it will not be at the top of a folder sorted by date. Use Show in Finder rather than hunting for it.